Wednesday, January 23, 2013

A thing of beauty

I have this crazily clever friend who likes to make stuff - well engineer stuff really. We often have good chats about tools and so forth. Well last year I was extolling the virtues of a hydraulic pres - and moaning about the expense no doubt. I showed him some pancake dies that I had - he even fixed one for me after it was damaged in the vice. Well miracle of Christmas miracles - guess what was waiting for me in his shed on Christmas day? Yup - a swanky handbuilt hydraulic press ....


AND IT IS RED!!!!
Which, as I am sure you are aware, makes it go faster .
It is truly a thing of beauty - I love it and can't wait to get on and make good use of it. So far I have tested out my pancake dies on a few different kinds of metal ...


...and they all turned out great! How lucky am I? A hearty thank-you to the Colin for all his engineering and re-engineering efforts. Ah, life is GOOD!

Saturday, January 19, 2013

Thrift-a-long

Oh it has been hot here - so hot that even intrepid op shoppers like myself have been clinging to the comfort of air-conditioned rooms. I did venture out a bit when we had a cooler day (only 36 degrees!) and I did indeed find some treasures ....


A whole assortment of goodies this week ..


brand new linen tea towels. I don't much like doing the dishes but lovely linen makes the job easier.


A couple of vintage glasses for a friend who has a project using them on the go and a pewter mug - raw material waiting for me to reclaim it!


Watches for dismantling and converting into locket-type jewellery.


 EPNS tray - more material for future projects.


An assortment of sweet earrings and charms.


These spoons are so pretty and appealing that I had to bring them home ... I also found an extra shelf for my oven which will be a blessing the next time the family is home for pizza. Oh and a pretty tin to cut up. Hope you had fun in the thrift stores this week. Hit the linky tool below and share your finds - would love to see 'em!

Tuesday, January 15, 2013

workshops/playdates

I have had the good fortune over the last few days to spend my time creatively - with creative types. Gotta love that. On monday I got to share the love of cold connecting with some fine gals who took to it like ducks to water. We made a goodly amount of mess ...


...and ate yummy macarons ...


Oh and and my students left with fantastic handcrafted wearables along with a bunch of new skills. Now that is a good day! Today a young friend came over looking for a distraction from the wait for Uni offers (first round on Thursday!) and looking to craft up a mosaic storm. Again, we managed to make a goodly mess ...


It was very productive and chopping up bits of china is a pretty good distraction ...


We managed to fit in a trip to the op shop - for supplies of course. And here is one of the mosaics my friend made - "Chiller Squirrel"! How much fun is that?!


I have had a really good time and I think if I was Prime Minister (or King of the World), I would issue a decree that everyone had to take one day off from work each week to dedicate to creative pursuits. I think it could work. Really. It would bring us one step closer to world peace. I am sure of it!

Tuesday, January 8, 2013

Tee shirt capers.

Sometimes I find t shirts in the op shop that have great images or fonts on the front but they are too big/small/weirdly-shaped to buy for anyone I know. It seems a shame to just leave them there ... Today I got crafty with a couple of old t shirts and thought I would share the process.

T Shirt grocery bags. Or library bags. Or maybe beach bags - who knows, I hate to be prescriptive ...

So first you need some tees. duh.


Let's start with that baby-doll pink one. First you have to hack off the arms and scoop out around the neckline a bit.


Then turn it inside out and shape the bottom. Go on - just eyeball it!


Now pin the bottom edges together and sew a seam.


Turn right-side out and you have yourself a handy tote!


I made a black one in the same way...


... but this time I cut the sleeves and neck out a bit deeper - it is a big shirt and I wanted the handles to be big enough so I could sling it over my shoulder. you could get seriously addicted to making these I think. I am stopping at two for now and moving on to t shirt number 3 which became a cushion. .


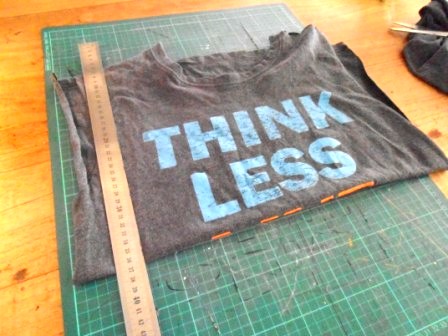
I fell in love with the slogan and the font and if it wasn't for a lack of wall space I would have just whacked it in a frame. Open plan homes have their limitations with regard to wall art so a cushion it had to become. First comes the deconstruction ...


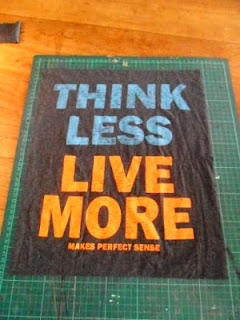
I used a steel rule and my trusty rotary cutter for this so that I could maximise the amount of t shirt retained. Once I had it cut out with nice straight (?) edges I bonded it to some fusible webbing stuff.


This stabalises the stretchy t shirt fabric and makes the whole process much, much easier. I had this stuff kicking around and it is pretty lightweight. Does the job perfectly though. Once  my fabrics bonded (awww) I decided that once sewn up the cushion was going to be a bit skimpy with the type pretty close to the edge.


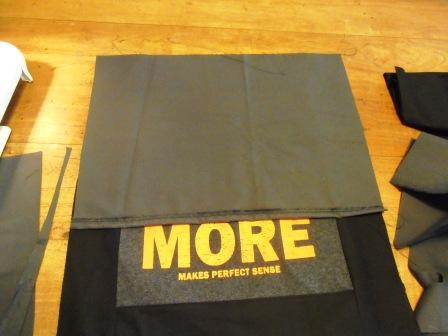
Not to worry - just add a little extra fabric ...


I had some black poly-cotton to hand so that kinda made the design decision for me. It would have been fun to hunt up a patterned fabric but it is just too hot today! I cut the poly cotton into strips and began by attaching one strip to the top edge of the t shirt panel.


Pin and stitch and trim after the fact - saves all that bothersome measuring and what not.


Then I did the same on the bottom and after pressing (yes,I do use an iron occasionally), I top-stitched the seams. See, I can go all professional on your arse when I want to!


Then the side strip of trim is added in the same way. Ditto the pressing and top stitching.


To make the back I used some more scraps of poly-cotton  These came from an Actil factory way back in the early 90's. My mother-in-law was a fan and kept buying more than she could use - in fact more than a small nation could use - and kept passing it off to me. Good quality fabric but nearly always dreadful colours/patterns. However, steel-I-just-threw-up-in-my-mouth-grey is just the ticket for this creation.


You need two bits that are the width of the cushion and each about two thirds the length of the cushion. This enables you to overlap the fabrics making a flap. No zip. No buttons. Love it.


Hem up the long edges (or cheat and use the selvage edges) and place face down on the cushion panel, overlapping the two pieces. Then you just sew all the way around the cushion. Turn right side out and - voila!   A cushion is born.


Here is how it looks on my couch.


This was a fun way to while away the hottest part of the day - not too brain taxing but still rewarding. And one more cushion to drive the ManBeast crazy ....

Sunday, January 6, 2013

Thrift-a-long

I was talking to a thrift shop lady the other day and she told me that this is one of their busiest times. They receive a lot of donations and sell heaps too. I was kind of surprised about that but I do live in a wine region that attracts a lot of visitors and with a bunch of public holidays etc I guess the Valley has been hosting more guests than usual. Anyway, I am delighted that they can muster volunteers over the holidays because it means a leisurely saunter for me! It was 46 degrees Celsius here the other day and the volunteers still turned up so a big shout out to them - especially the ones who work in a tin shed! I have a few projects in mind for the summer so I was on the prowl for components. I found an old lampshade ...


or two. They will both become something other very soon. I will show you pics when they are done!

don't judge me - I know it is ugly!
Just look at the vinyl I found - some classics here - and all for one dollar each! I nearly swooned ...


I'm afraid it is going to be "off with her head" for this young woman. And her companion.


This is a great book. More about metalcraft than jewellery but with great diagrams and really useful info such as the melting points of a variety of metals. Score! Just love useful books.


A whole stack of odd bits of plastic - awaiting transformation ...


 Just to prove that I am not becoming some kind of whacked out hoarder, here is what I did with that plastic. And a pewter mug. And some sterling silver ...


I hope you found some time to visit your local oppie too. If you would like to share your treasures then just click on the link below.


Saturday, January 5, 2013

Skirt Revamp

What to do when it is 45 degrees (Celsius for those of you using non-metric measures) outside? The answer is, stay indoors and make a 45 minute skirt. I am going to share this makeover with you but it comes with a disclaimer. I am not much chop at following a pattern or ruling straight lines - when my kids were little and I wanted to make them something I just got them to lie on the fabric and cut around them (thank Heavens for stretch fabrics huh?!) - so my disclaimer is this - if you find a wanton disregard for the 'rules' of stitching or have a predisposition to OCD - read another blog now. This is messy, not-too-straight and possibly a little wasteful of fabric by not measuring ... If however you have adventure in your heart - read on...
(I should also mention that this really only takes 45 minutes if you don't stop for a cooling bevvie - or two ...)

First you need a cheap and daggy skirt from the oppie.


 I found a black one and a red one - all our op shops are having post-Xmas sales so these were only $1.50 each. I am going to re-do the red one first.


 It is classic late 80's fashion - well made but ugly - too long and frankly when you are under six feet tall a solid block of colour like that on your lower half can be a bit of a disaster ..

 Step 1.
I removed the lining. I did this because I loathe the feel of that stuff. It isn't a necessary step. I didn't unpick it - just cut it off as close to the waistline as possible.


Step 2.
I took a chunk off the bottom of the skirt to shorten it. Remember to allow for a hem - about 2cms extra will give you the chance to turn the hem over twice and topstitch for a neat finish.


Step 3.
Next open one of the side seams from the bottom of the skirt to about 2cms below the waist. Essentially we are going to make a fabric panel that will cover two thirds of the front of the skirt and will be attached by poking it into the side seam. This will all become clear. Trust me.


Step 4. and 5 and 6. (and 7!)
This is the fun part 'cos you get to fish around in your fabric stash and make some choices about what you want your skirt to look like.


I had this largish bit of vintage floral so decided that would be swell.


It did need a little something to tone it down a bit so I tried a blue patterned fabric (from an old skirt)


Just mess about with the fabrics until you get something you like ... This is it - my front panel is going to have these 3 fabrics. The overall panel needs to be a bit larger than what you want to end up with because there is hemming involved and also it will be fitting into the side seam of the skirt. You can eyeball this as you go along really because if it is too big you just trim it after.


Step 8.
Now we construct the panel. Pin and stitch contrasting bottom trim to main panel. Don't worry about measuring the width - just line up the two edges with right sides together and stitch away.


See - you can just cut the trim to size after it is stitched - I did warn you about my sloppy sewing habits so don't act all shocked ..


An iron is pretty handy about now because it is in fact a good idea to open this up and press it and the seam nice and flat. If you are going to top stitch this part for decorative effect - now is the time to do it .


Step 9.
Now you do the same thing for the other contrasting trim.


Stitch, trim to size. open and press. Topstitch if you like. This time you need to hem the edge ... that is the long edge that will NOT be going into the side seam of the skirt.


Step 10.
No photos of this bit I'm afraid but it is pretty easy - just hem the bottom and the top of the panel. I just turned the fabric over 1cm and then 1cm again and machine stitched. If you use contrasting thread this adds another decorative element.

Step 11.
Now you have a nice patched together panel that is decoratively stitched and hemmed on three sides. Position it on the skirt -remember  that unhemmed side has to go into the side seam so make sure to allow for that. Inevitably my panel ends up way larger than required so heaps of it gets shoved into the side seam and trimmed up.When you have your panel the way you like it, pin it to the front of the skirt. Use plenty of pins as this stops it from squidgeling about when you stitch up the seam.


Turn the skirt with the panel pinned in place, inside out and poke the unhemmed edge of your panel through the open side seam of the skirt. In the pic above all the fabric to the left is excess panel and will be trimmed away after stitching, Pin it well and stitch. For some reason that I do not understand, if you stitch from the bottom of the skirt to the waist it will turn out more even than if you stitch from top to bottom. Once you have stitched the three layers together (skirt, panel, skirt) you can trim off the excess. If you have an overlocker this would no doubt be an excellent time to use it.

Step 12.
Turn skirt right side out and you will now have a skirt with a panel flapping about on the front. You can secure it to the skirt with some nice buttons etc. I just run a line of stitching about 10cms across the top and down the side of the panel to secure it. This is because I never, ever, ever wear anything tucked in - a fact I attribute to the girl-bullies at High School who were merciless in their ridicule of me when I turned up with my Golden Breed T-shirt tucked into my high waisted Levi cords - perhaps that is a story for another time ... but it means that I like the front to be button bump free - hence the stitching. If you chopped off the bottom of the skirt to shorten it, don't forget to hem it now.


Step 13.
Voila! A much better version of itself don't you think? I am looking forward to teaming this up with leggings and a tee -not tucked in obviously ...


Hope you can make sense of all this! Happy stitching.