Sunday, September 30, 2012

Thrift-a-long

Every year a man turns up in the Valley selling bags of mangoes from a stall on the side of the road. For me his arrival  heralds the beginning of the warmer weather and the anticipation of a summer fruits - yum. It also signals that it will soon be time to make mango chutney! I didn't buy any of his mangoes this week -  they are probably not as gorgeous yet as they will become and also I didn't have time to make chutney this week. However, with a bit of rare forward planning, I did call into a local op shop to get some jars. I bought a lounge suite. Yeah you all know how that happens don't you - it isn't really a huge leap from a box of jars to a three piece lounge suite now is it?! Other than that I visited my daughter and we went to a couple of seaside thrift stores. We didn't unearth a lot of treasure and since it is school holidays, the shops were pretty crowded. I am taking that as a good sign. These kids are the next generation of op shoppers and are learning the ropes from their parents!

In the end I came home with a handful of beads and scapulars and some devotional cards, having had a lovely time with my kid. The scapulars are the devotional kind, worn by the faithful to remind the wearer of a pledge or promise perhaps to a certain saint or a way of life. They often have religious text or images on them and are made of two small pieces of cloth or wood joined by a strip of fabric or string.One rectangle of cloth is placed on the chest and the other hangs over the wearers shoulder.


The ones I found are not overly beautiful but I rather like the idea of incorporating them into a piece of mixed-media jewellery.


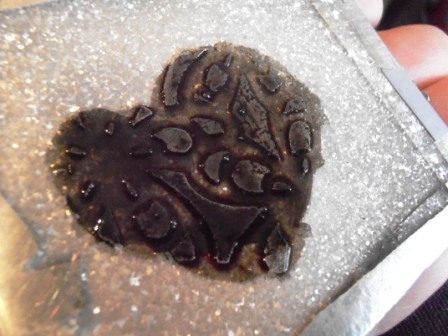
This is an image from a devotional card and is in a style that I particularly like - somewhere between medieval and Russian icon! Deep, rich colours and she kinda seems to be looking at you ...


Ah Job's Tears - what can I say about these delightful natural seed beads? These amazing seeds come from a drought-resistant grass and have been used as beads since at least 2000BC - which is unsurprising in that when they are fully mature, they have  a perfectly formed hole through the middle - easy threading. A completely natural bead, crafted by Nature. They are often used to make rosaries. Indeed Mother Theresa's favourite rosary was made of Job's Tears.


So it would seem that my thrifting this week had a quite ecclesiastical bent  - well, apart from the lounge suite - nothing spiritual about that at all! How about you, what sort of things did you hunt up this week? Did you find something special to add to a collection perhaps? Click on the link below and share the fun!

Thursday, September 27, 2012

A little ray of sunshine ...

There is nothing like a little sunshine to encourage a body to go outside and plant something is there? It has been a perfect Spring day  here today so I decided to plant out some herb seedlings and have a general post-Winter tidy up of the pot plants. I really let things go over the Winter months. It is a mess. Just look at this ...


That my friends is what happens when good intentions - I'll clean those and put them in the recycling bin - do not come to fruition. Eewwwwww!  Yet I knew there had to be a use for so many cans - they are amazing objects really and it seems a shame to waste them. Firstly of course they had to be cleaned. I got to work on them with hot soapy water and a scrubber sponge. I wore good, thick rubber gloves too 'cos the inside rim can be a bit sharp. They came up a treat - nice and shiny.


Removing the glue used to adhere the label was a bit of an effort - I used eucalyptus oil which worked well but it still requires a bit of elbow action. I decided to use these to pot up some leftover seedlings. My mother-in-law was an excellent gardener - she even managed to grow a banana palm in the Adelaide Hills - and it bore fruit! She was a post-war migrant and never wasted anything so she would use whatever containers were at hand to strike plants etc. Yogurt pots, margarine containers - you name it she would whack a plant in it. Her trick apparently was to put a piece of sponge in the bottom of the container and then top it up with soil. So I figured I would follow suit - I hacked up an old sponge, filled to pot with soil and planted my little herbs etc.


I will let you know how they grow. I am guessing the tins might get a bit rusty over time but I think that would add to their appeal. I s'pose you could give them a coat of clear varnish if you wanted them to stay shiny ...
These would be nice to give away. As a final gift-giving touch, I added a label.


The only truly difficult part of this project was seeing the look of disappointment on my dog's face every time I came inside with an empty can of dog food!


Poor old Rex - he has to wait until dinner time!

Monday, September 24, 2012

Trash to Treasure

Or in this case from creepy little clown ....


.... with 'good' hands, to a one-of-a-kind lovely necklace!


Disclaimer : the hand was removed from the clown swiftly, painlessly and without malice. (don't wanna get the Clown Union on my arse!)


I used an old, slightly crusty thimble as a cap for the porcelain hand and added some pearls and crystally bits. The whole thing is suspended from a vintage key. Currently it is strung on a ribbon I stitched out of eucalyptus dyed silk. That may change. The hand itself is just under 4cms from the rim of the thimble to the longest digit.


Which makes that little red heart  the tiniest thing I have ever enamelled! I think the piece brings to mind that Shaker saying "Hands to work, Hearts to God". Of course nowadays I would have to amend that to:

"Hands or other appropriate body parts to non-leisure activity, Hearts or whichever organ you associate with deep seated feelings to your chosen deity, spiritual being or personal belief system."

I am nothing if not politically correct. 
Anyhoo thought you might like to see the turnaround from thrifted creepy clown to this. At the very least it does prove that I am not one of those crazy hoarders they have in TV shows - I do actually use the stuff I collect from the oppies.
Sometimes.

Sunday, September 23, 2012

Thrift-a-long

I think the very nature of op shopping is why it is so appealing - you never know what you might find - or won't find! It really is like a treasure hunt. I think as a vice/pastime it is pretty innocent - way less expensive than playing the pokies, but probably as addictive. I had occasion to be a depositor at the local thrift store this week. It is Spring so I had that urge to clean out my wardrobe so I recycled back all those clothes I just don't need - most of which came from an op shop in the first place. One can never simply drop and run. I had to have a look around ...


Honestly I am not that fond of clowns and I really don't like china dolls - this one though has rather nice hands ...


I think they will work well in a necklace or somesuch. Of late, I haven't found much in the way of pewter in my op shop forays. And when I have, it has been really pricey - sometimes as much as ten bucks for a tankard! That is a bit steep for me so imagine how happy I was to find these ...


They are battered and worn which makes zero difference in the melting pot.


And they were only fifty cents each. That's what I'm talking about!
Hope you have found some wonderful treasures this week. 

Friday, September 21, 2012

Have you seen this ....?

I was in Spotlight yesterday to buy some Mod Podge. Naturally I couldn't resist a trundle down the beady aisle. Imagine my surprise when I came across this stuff.
( Don if you are reading this, avert your eyes - NOW!)


Nooooooooooooooooooo!! But wait - there is more ...


Seriously? Urban Warrior? Aarrrggghhhhh! This does my head in. I can only hope that people get that these are cheesy money grabs trying to replicate an aesthetic that only works because of the authenticity of the materials used - you know, found objects, actual discards and remnants of the past? Sheesh!

Tuesday, September 18, 2012

Resin - ating ...

A few years ago I was fortunate enough to attend an art retreat and take some classes with the most marvelous Susan Leanart-Kazmer. I had been a fan for quite some time so it was a really big deal just to meet her let alone suck up all the knowledge and skills she was very generous with. At the time Ice Resin was a relatively new product and fairly hard to source in Australia - now thank Heavens you can easily pop over to see Jen and get it! It is a really good product but I haven't experimented with it as much as I could have. Playing with resin can be pretty messy (at least when I do it!) so you need to set aside an appropriate space to work in and  - blah blah blah. No more excuses - I decided that I would dedicate a little time to this medium. First I made some bezels. I used copper pipe and soldered on jump rings. This is a pretty time consuming thing to do - especially when you consider the cost of pre-made bezels - they are fairly inexpensive really. Still, like soapmaking, at least I can say I did it.


Here they are with the first layer of resin. My intention was to create double-sided charms using origami paper.


I had always thought the idea of making coloured resin sounded like a good idea. In the dim recesses of my mind I had some recollection of Susan mentioning oil paint to colour Ice Resin. Naturally I didn't bother to do a quick reccy on the Net - preferring instead to sally forth in my usual gung-ho fashion. I added rather a lot of oil paint in relation to the amount of resin which did result in a lovely opaque colour.


I used molds that I have made in the past for resin casting.


And if you don't clean them you get all this black stuff on your resin. I don't mind it though. The thing with these is that they are still after 3 days fairly flexible. Quite likely this is due to the addition of a sizeable dollop of oil paint. I will try it again with less and see what happens!


I hate to waste anything - even an experiment so I resined the little bird to some reclaimed metal and have cut it out so that I can make a brooch.


It turns out that I couldn't be arsed making double sided charms. Or using paper. You have to seal it both sides and I didn't have a paper punch the right size and apparently I am too lazy/wobbly to hand cut circles. I do however own a disc cutter so I used tin instead of paper. (don't judge me!)


I have made pairs of these so they can readily be made into ear-rings. They seem to take awhile to make but that probably has more to do with waiting for the resin to cure than actual effort. I am planning another lot of random ones next - I might even use paper. Okay so I will need a paper punch first ...

Sunday, September 16, 2012

Thrift-a-long

The op shops were not playing their Siren Song for me this week - I think the days sped past before I really had a chance to think about getting out for a spot of treasure hunting! I did however get myself along to a school fete - the small , country town variety. It was great fun! Not only were there amazing confections like these ...


there were plenty of plant and produce stalls and lucky for me - a great big bric-a-brac table laden with goodies!

I purchased beads and china, pretty glass, an awesome piece of patterned copper and - well, some more tins. They are really pretty though! Ok so I think I am going to get tough about the Tin Moratorium 'cos I am running out of room to house them! Most  of these I will cut up which does make storage easier ...
I hope you had fun thrifting this week. Apologies to everyone who tried to link up with Thrift-a-long last week - the link kept disappearing! I have sussed out another link tool so hopefully we will have better luck this week. Link up and join the fun

Thursday, September 13, 2012

One for the Gents ...

David Suchet as Agatha Christies Poirot, has long been my favourite version of the Belgian detective with a penchant for snazzy shoes and waxed moustaches.


Isn't he dapper? I have also been a fan of the adorable boutonniere he wears with his impeccably tailored suits. For a while now I have been imagining making some of these from hollow handled cutlery. I finally snagged some hollow handled knives.


Sometimes things are not what they appear to be for seemingly hollow handles may in fact be filled with plaster, rosin or cement! Needless to say that makes sawing through them rather challenging.


The detail on some of the knives is really lovely. I think this shield shape will really suit my purposes as it has a kinda masculine look about it so it just might be the next one to get the chop!


Ta da! After some sawing, filing and cleaning up here is my first little boutonniere.


tres chic, n'est pas?


A substantial brooch pin  on the back. Easier for manly fingers to manage perhaps?


Pop a little damp sponge in there and the fresh flowers will stay fresh for ages. I just love this idea - do you think I can convince the blokes?

Wednesday, September 12, 2012

Wanna come up and see my etchings ...?

Ba ha ha! Actually I'm doing a little Etching 101 today. If you are up for it - read on!
I was in the scrapbooking department of our local discount store (don't judge me) when I spied some small self-adhesive stencils. Normally when I etch metal I draw on a design which is fine except that it generally lacks consistency and is hard to repeat - that is the free-form way I'm afraid. So I thought "hhmmm - if these little stencils can be re-used, they might be just the ticket" and plonked my two bucks on the counter and brought them home. This post is all about how I used them - an experiment really.


Firstly I cut and flattened a piece of pewter. It got a good clean-up with scrubber and wiped over with alcohol (not Tequila - what a waste!) - the boring non-drinkable kind.


On goes the stencil - it was kinda stretchy but settled into place without too much wrangling.


Here I have coloured in all the negative space using a permanent texta. For some reason black works best. I gave it two coats, allowing the first to dry before the next application. This is the resist.


Taped onto polystyrene, ready to be floated in the acid.


In the acid bath. I was down to my last few mils of Ferric Chloride and it quickly became apparent that there was not enough liquid to float my metal. Since the plate was hard up against the bottom of the bath there was no etching action going on. sigh. I hauled it out, took it off the polystyrene and washed it off. Once dry, I used gaffer tape to protect the back and sides and put it face up in the bath.


And this is why I prefer to float the piece. When you do it face up all the little particles that are etching settle onto the face of the plate creating that speckling. It is not a big deal in this case but I would be pissy about in other circumstances!


It is tricky to see what is what so I brushed on some patina ...


and gave it a quick sand to reveal the high areas.


I drew around the outside to give myself a cutting line.


Here it is cut out. The actual pattern is hard to discern but could be countered if I had drawn in some connecting lines before I etched it. Good tip to remember - the negative space on the stencil is the bit that will stand out 'cos it will be the raised surface - duh (insert head slap here)


Pewter is pretty soft so my intention for these stencils would be to create patterned hearts that would be fixed to larger, sturdier hearts like this one. The end product of the experiment hasn't knocked my socks off but now I know the stencils can work and will be a better judge of the type of patterning next time. Just gotta get me some more acid - mwhahahah!

Class dismissed.

Monday, September 10, 2012

New pendant - as promised!

I spent a goodly amount of time blathering (?) about trying to decide how to finish off the pendant I showed you in the last post. Did I want to make a bail? Or maybe just a hole? Or hang it from a tube thing? Arrrggghhh - damn that 'design by making' thing! Anyway, here 'tis ...

Riveted together
The hanging mechanism - a little pewter casting.
I thought a bird was a good fit with the 'tree' printed on the tin.
I used dyed Sesame Jasper for the necklace.
It has been ages since I did any kind of beading - my focus has been on other kinds of jewellery making so it was lovely to have a fish about and select these lovely stones.

Reclaimed pewter, tin, sterling silver, vintage Japanese seed beads, dyed sesame jasper.
I am not planning to list things much on Etsy because I have  a web-site under construction - and well it all seems like a bit of an effort ... For the time being, I thought I would show you the pieces for sale as I make them and if anyone is interested they can email me. This was great fun to make so I think I will be making some more - maybe some earrings too ...?